Once you start collecting case studies, the next step is to distribute them both online and offline.
The goal is to get potential clients to see your case studies as many times as possible across different media.
There are 4 main ways to distribute your case studies, as illustrated below:
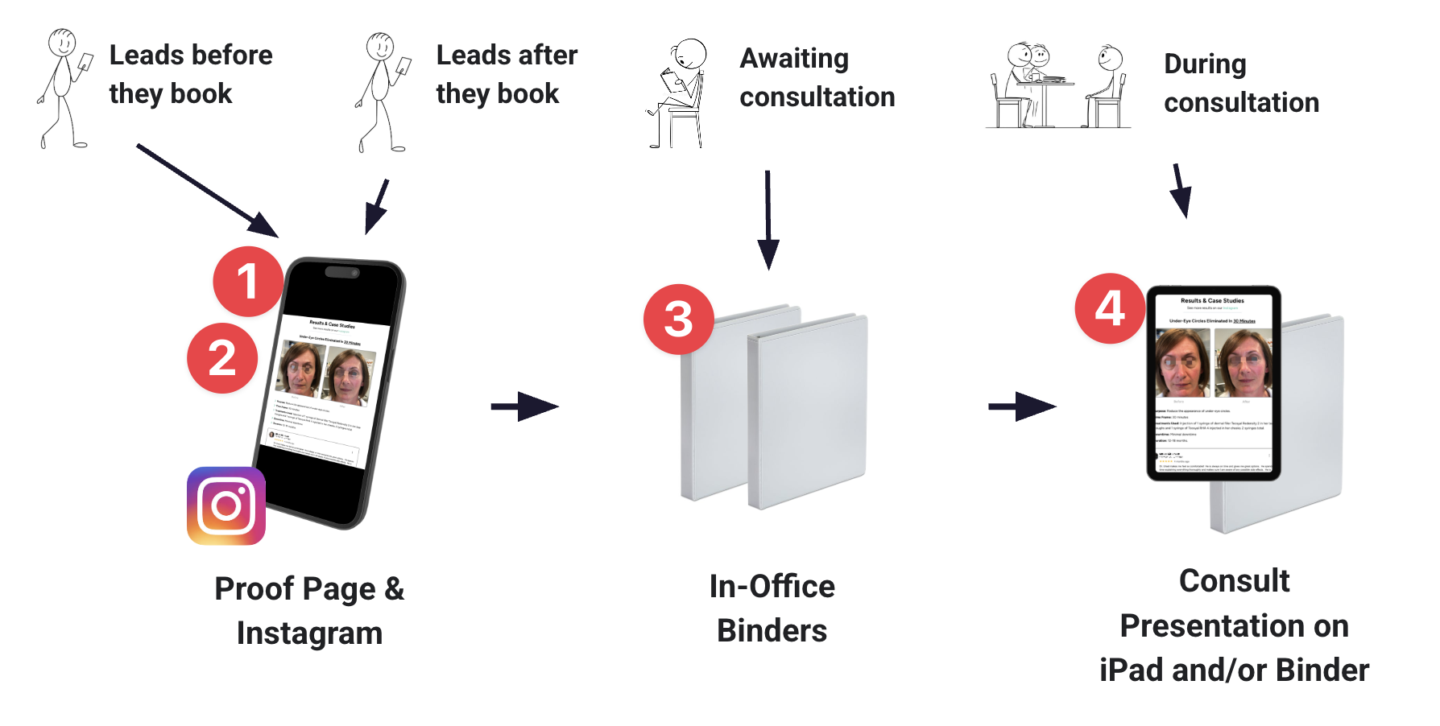
1) Proof Page
Your Proof Page is the “source of truth” for all your case studies.
Visit the Add Case Studies To Funnel training for instructions on adding case studies to your Proof Page.
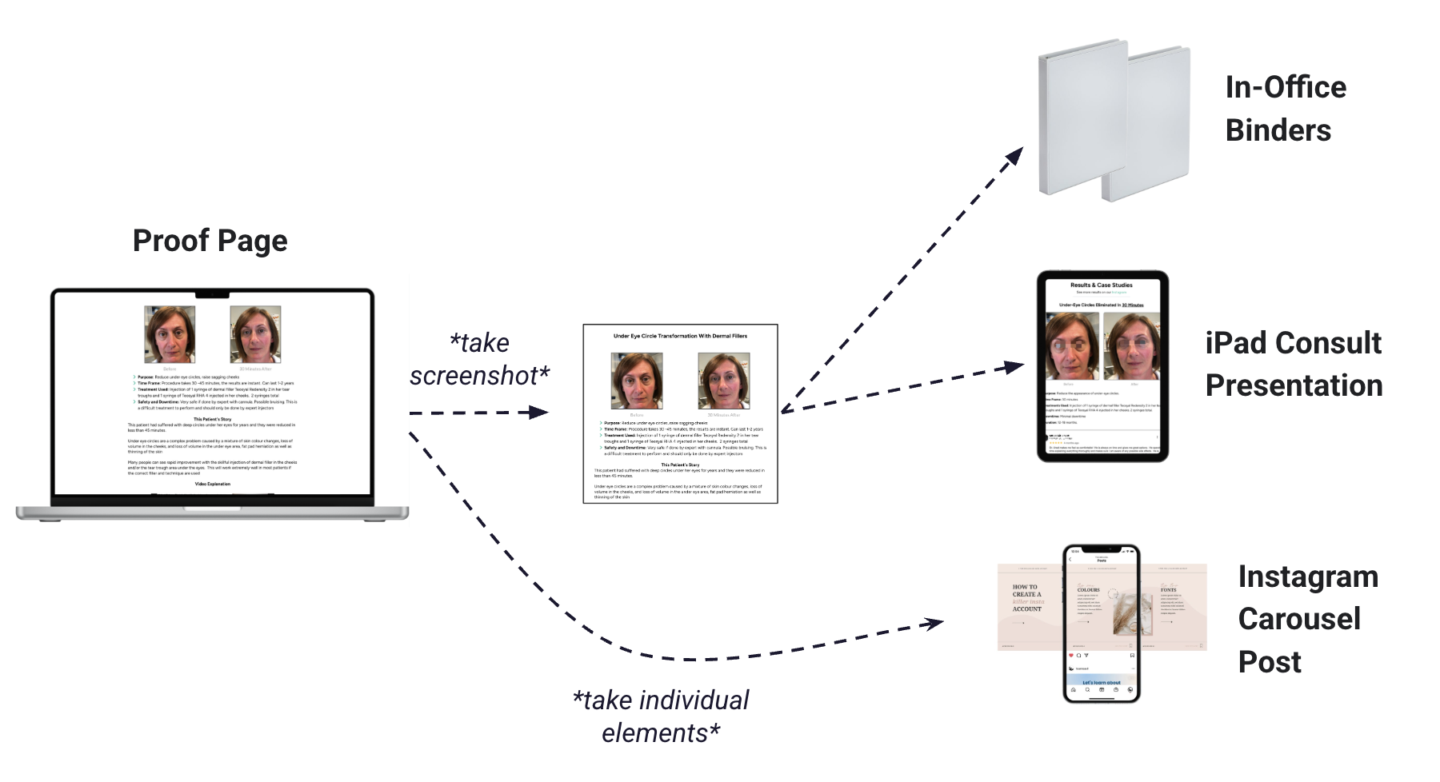
Once you’ve added a case study to your Proof Page, you take a screenshot. You can then add that screenshot to your in-office binders and your consult presentation.
You can also take the individual elements of each case study to then create Instagram carousel posts.
2) Instagram
The best way to distribute your case studies to Instagram is through carousel posts.
The Add Case Studies To Instagram training shows you how to do this.
3) In-Office Binders
Binders are the best way to distribute case studies in the clinic because they allow you to add your case studies one at a time as you collect them.
The goal is to continually build your book of case studies, ever adding to your stockpile of proof that you get amazing results.
Visit the Add Case Studies To Binders training for instructions on this.
4) iPad Consult Presentation
Finally, you want to add your case studies to your iPad consultation presentation so you can review them with clients during the consultation.
You can also transfer your presentation to a binder if you prefer flipping through a physical booklet with your clients.
Visit the Add Case Studies Consult Presentation for instructions.
Transcript
0:01 Here is how to distribute your case studies. So once you've actually collected some case studies, the next step is to get as many eyeballs on those case studies as possible.
0:11 This is how you get the case studies to do the selling for you to make your job much easier during the consultation.
0:17 So the goal is to get as many clients to see your case studies as many times as possible across different media and there's four main ways to distribute your case studies.
0:26 The first way is to approve page. So your proof page is part of your master appointment funnel. It's a website that you can send people, oops, it's a website that you can send to people before they come in You can also show your case studies on Instagram as well.
0:39 So before people book after they book They can be sent to these pages and look through your case studies before they actually come into the clinic The next step or the third way is awaiting the consultation.
0:49 So when they're actually in the consultation room Don't just have them go through some you know generic trashy magazines Why not have them flip through your results in clinics?
0:57 So you want to have in-office binders in your waiting room so people can read through those, and then also in your consultation room.
1:03 So in your consultation room, you can show the case studies in either your iPad presentation or you can also have them in your binder as well.
1:11 Lots of people like an iPad, but lots of people also just like to flip through a physical book. They like that format so you can have the case studies in your console as well in the binder form.
1:20 Okay, so onto the proof page. The proof page is your source of truth for all case studies. And if you go to this training, how to add case studies to your funnel, it's the next training actually.
1:29 It's going to show you how to add your case studies to your proof page. And we've created a really nice template.
1:34 So it's very easy to add your before and after photos. You can add your write up. You can have all add all the information that creates a great case study.
1:42 What you can then do is take a screenshot of each of those case studies and then distribute that screenshot to your in office binders to your console presentation.
1:51 Then for your Instagram carousel post, you're gonna take the individual elements because you can't just put like a screenshot in one post.
1:58 And this is just a very quick and easy way to do it. You can also take, you can like manually create a different format for your in office binders, but it's just so easy to take a screenshot of your proof page, add it, print the page off and add it to your binder to show your case studies there.
2:14 So the proof page is your source of truth for all your case studies. Instagram. So Instagram is an amazing way to distribute your case studies.
2:21 You already know that, you know, everyone's on Instagram. It's very popular in this industry, especially. So this training, how to add case studies to Instagram.
2:28 It's after how to add case studies to your funnel. It will show you how to use carousel posts to add your case studies there in office binders.
2:36 So this is an amazing way to distribute your case studies because it allows you to just add them one at a time.
2:42 If you had like a, if you had to print out a full booklet, you'd have to print out a new booklet but each time you got a case study, but if you have a binder, you can just create each case study, you can print them off, laminated, whole punch it, put it in the binder, and it's a super easy way to create
2:57 a book of all your best results in clinic. And we have training on that as well. And then finally, the iPad consultation presentation.
3:04 So many of you are already using this iPad presentation in your consultation, instead of just having plain before and after photos, you can also have your case studies in there as well.
3:13 So that's how you distribute your case studies and in the next trainings, I'll show you how to actually add them to your funnel, Instagram, binders, and your consultation presentation.