Closing Process - Checkout
Follow this process once the client has agreed to your recommendation and is ready to start!
Step 1: Run Payment Through
Bring them to the front desk to run the payment. If they’re purchasing skincare products, you can bag the product in the waiting room, which can pique the curiosity of other patients.
Step 2: Book Next Appointment(s)
At the very least, you should ALWAYS ensure the patient has a future appointment on the books with an incentive to attend that appointment.
PRO TIP: For injectables clients, we recommend offering the patient a free skin treatment if they book their follow-up that day. If they cancel or reschedule their follow-up, they lose access to the free treatment. This is a powerful incentive to ensure patients return for their injectables follow-up.
Step 3: Send Patient Home With Treatment Plan
You can print out the Tailored Treatment Plan and send it home with them. Instructions for printing off the Tailored Treatment Plan HERE.
Step 4: Mark The Outcome Of The Appointment In The Software
How To Update An Opportunity:
-
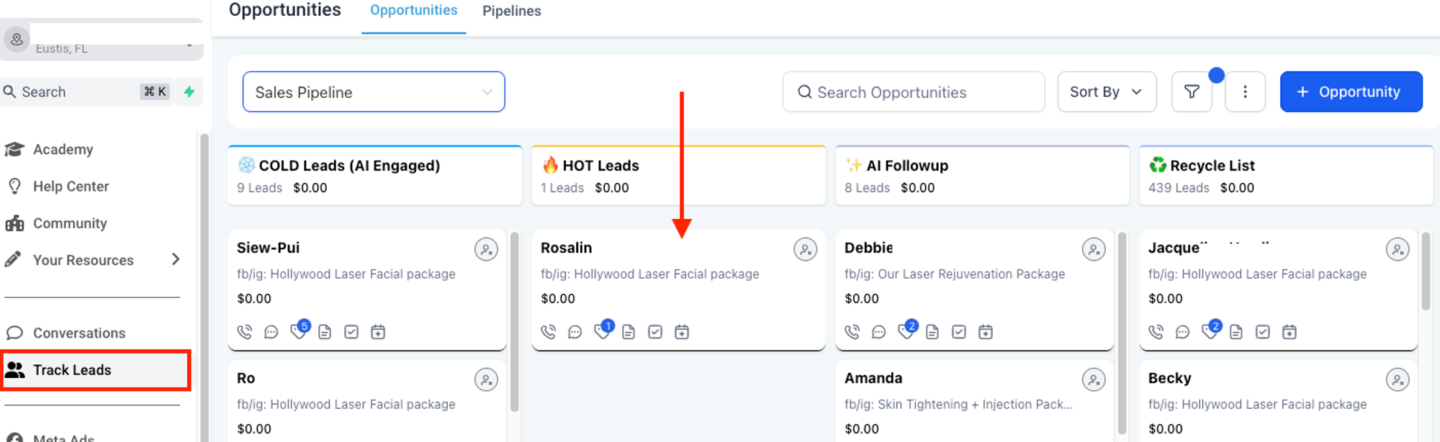
Select “Track leads” at the software sidebar.
-
Drag & drop the contact card to the ” ✅ Showed (add sale value)” stage.
-
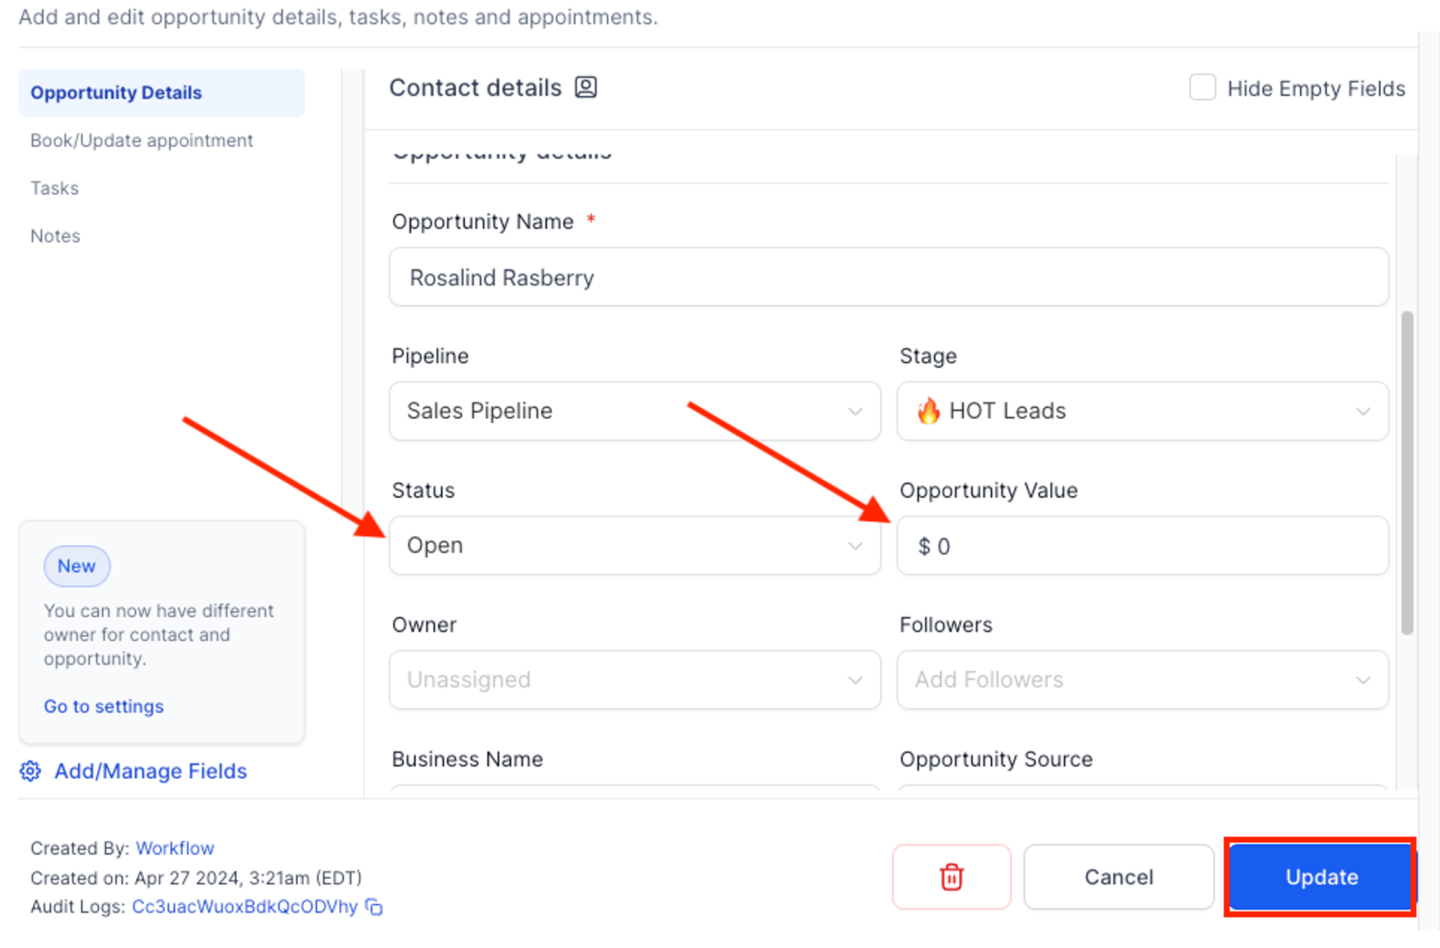
Click on the contact card to update the opportunity status & value. Change the status to “Won” if purchased, “Lost” if not purchased, and then enter the total value of the sale under “Opportunity Value”.