Setup Guide
Step 1: Request Your Webchat System
>> CLICK HERE to open the add-on request form and fill out your business information.
You will receive a notification email within 1-2 business days when the system is configured and ready to install.
Step 2: Install On Your Website
Once the system is configured, you must install it on your website. The exact instructions will depend on where your website is hosted.
If your website is hosted on our software:
If your website is hosted on WordPress:
-
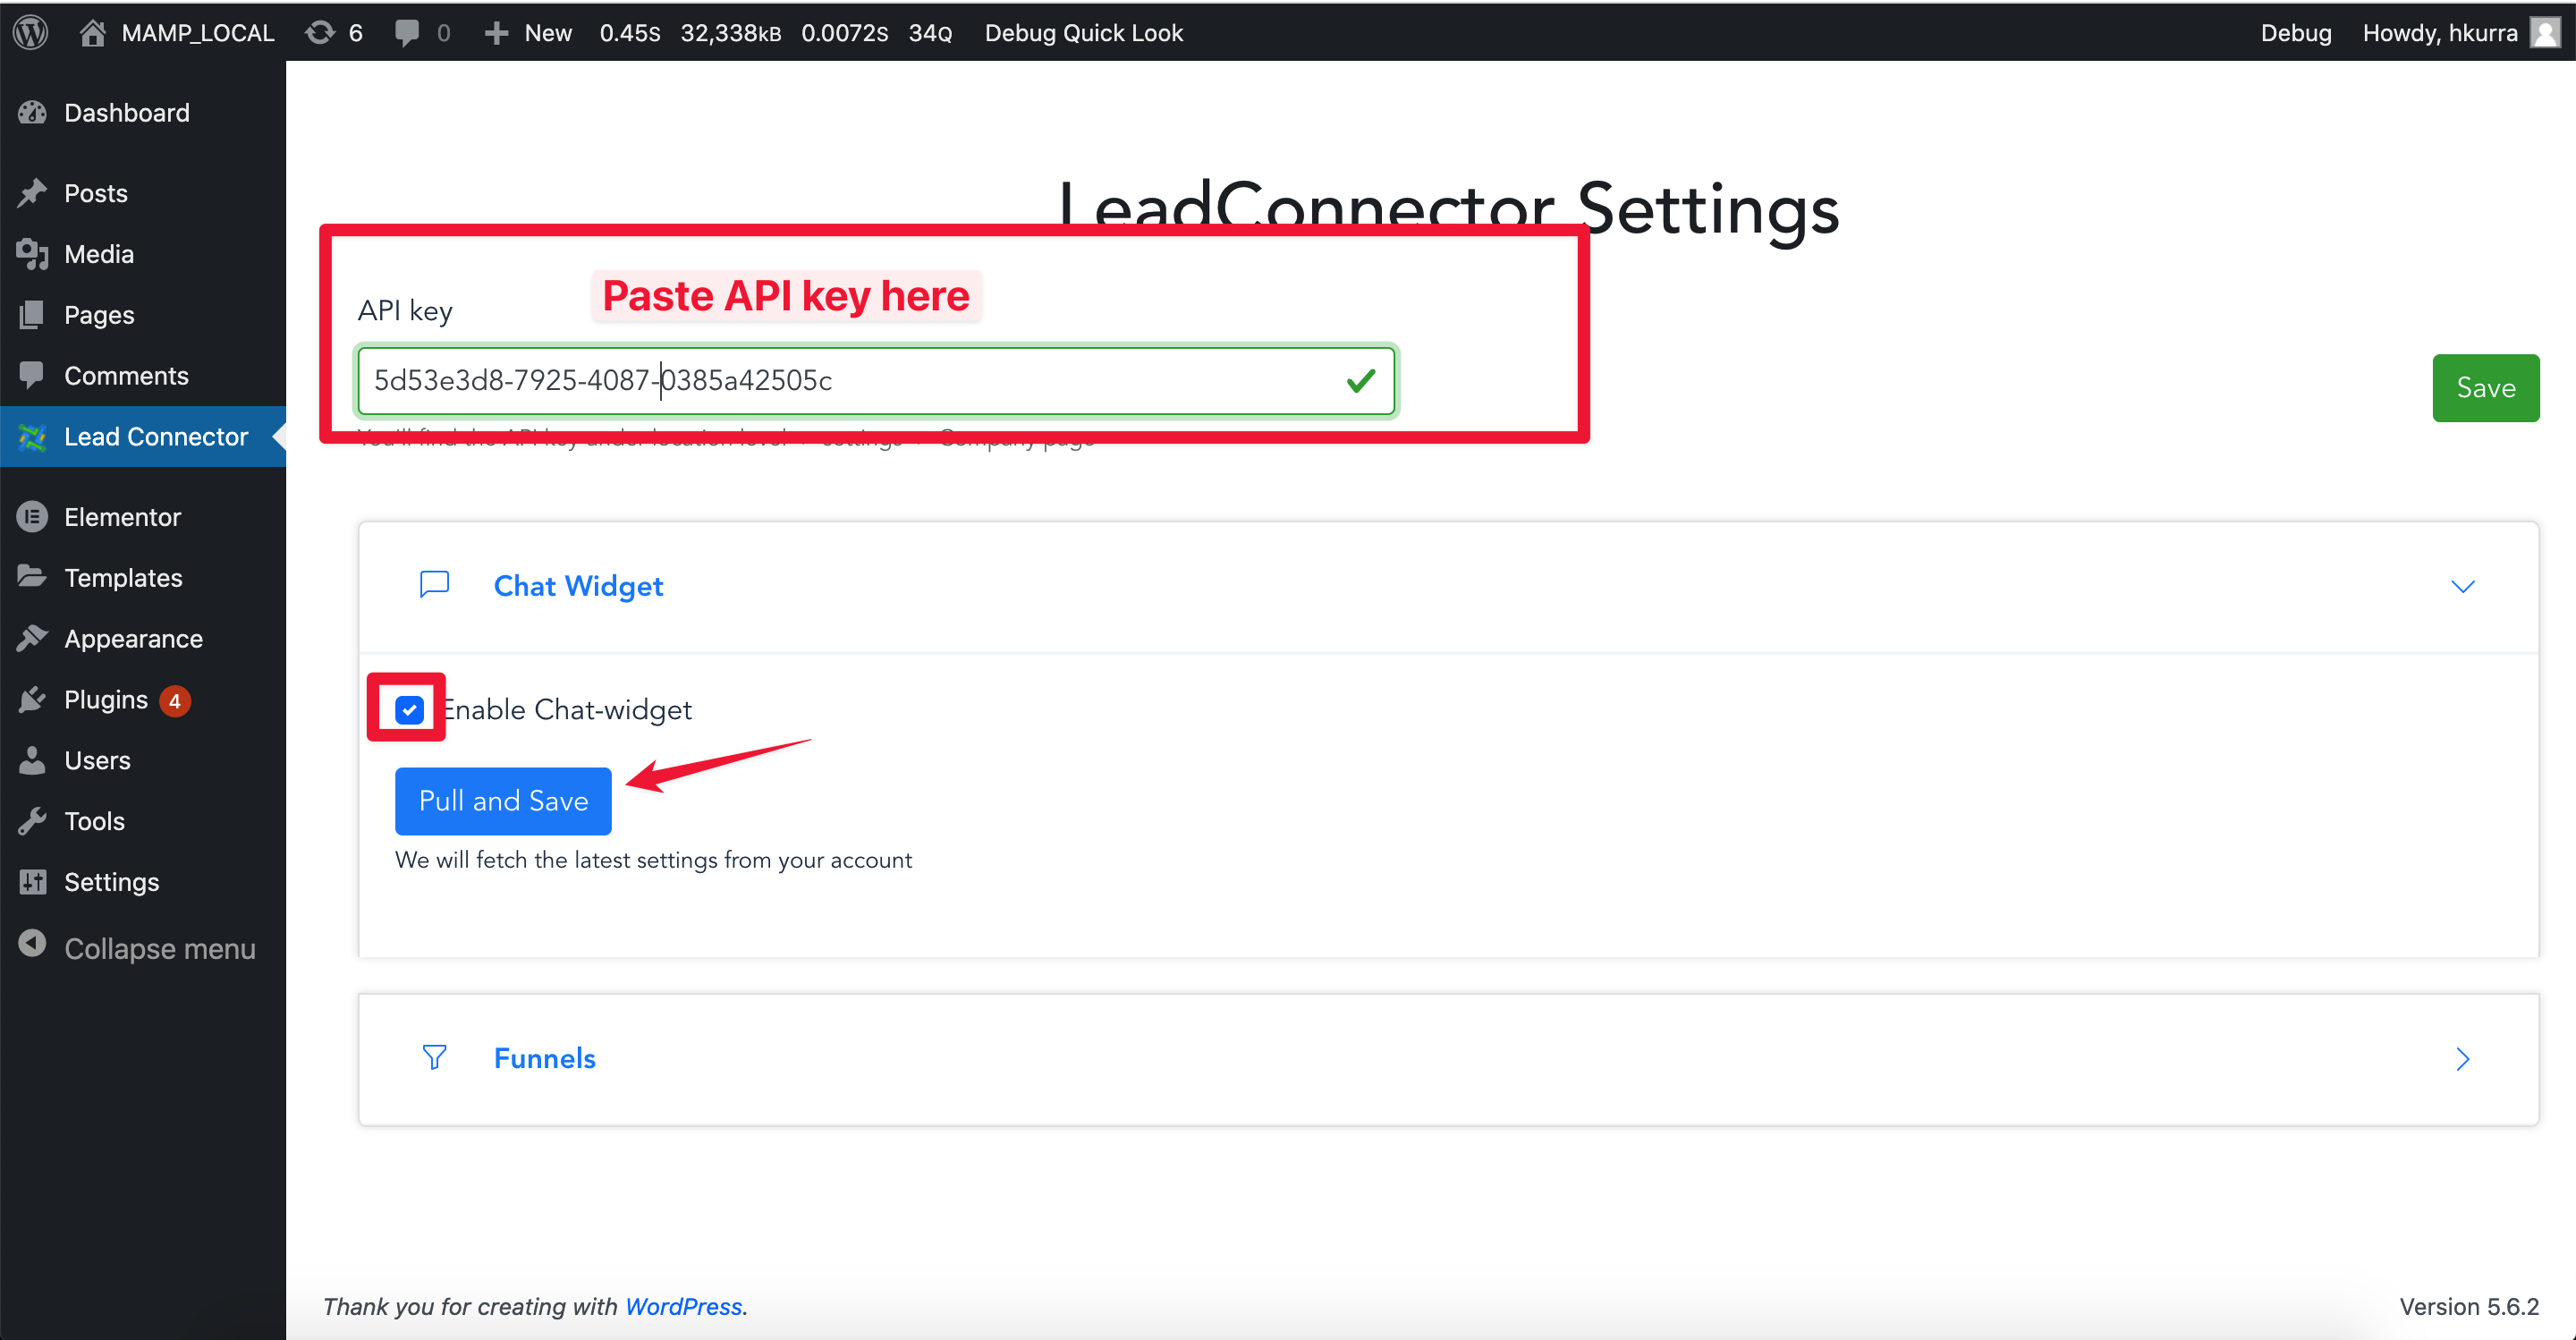
Install the Lead Connector plugin on your website.
-
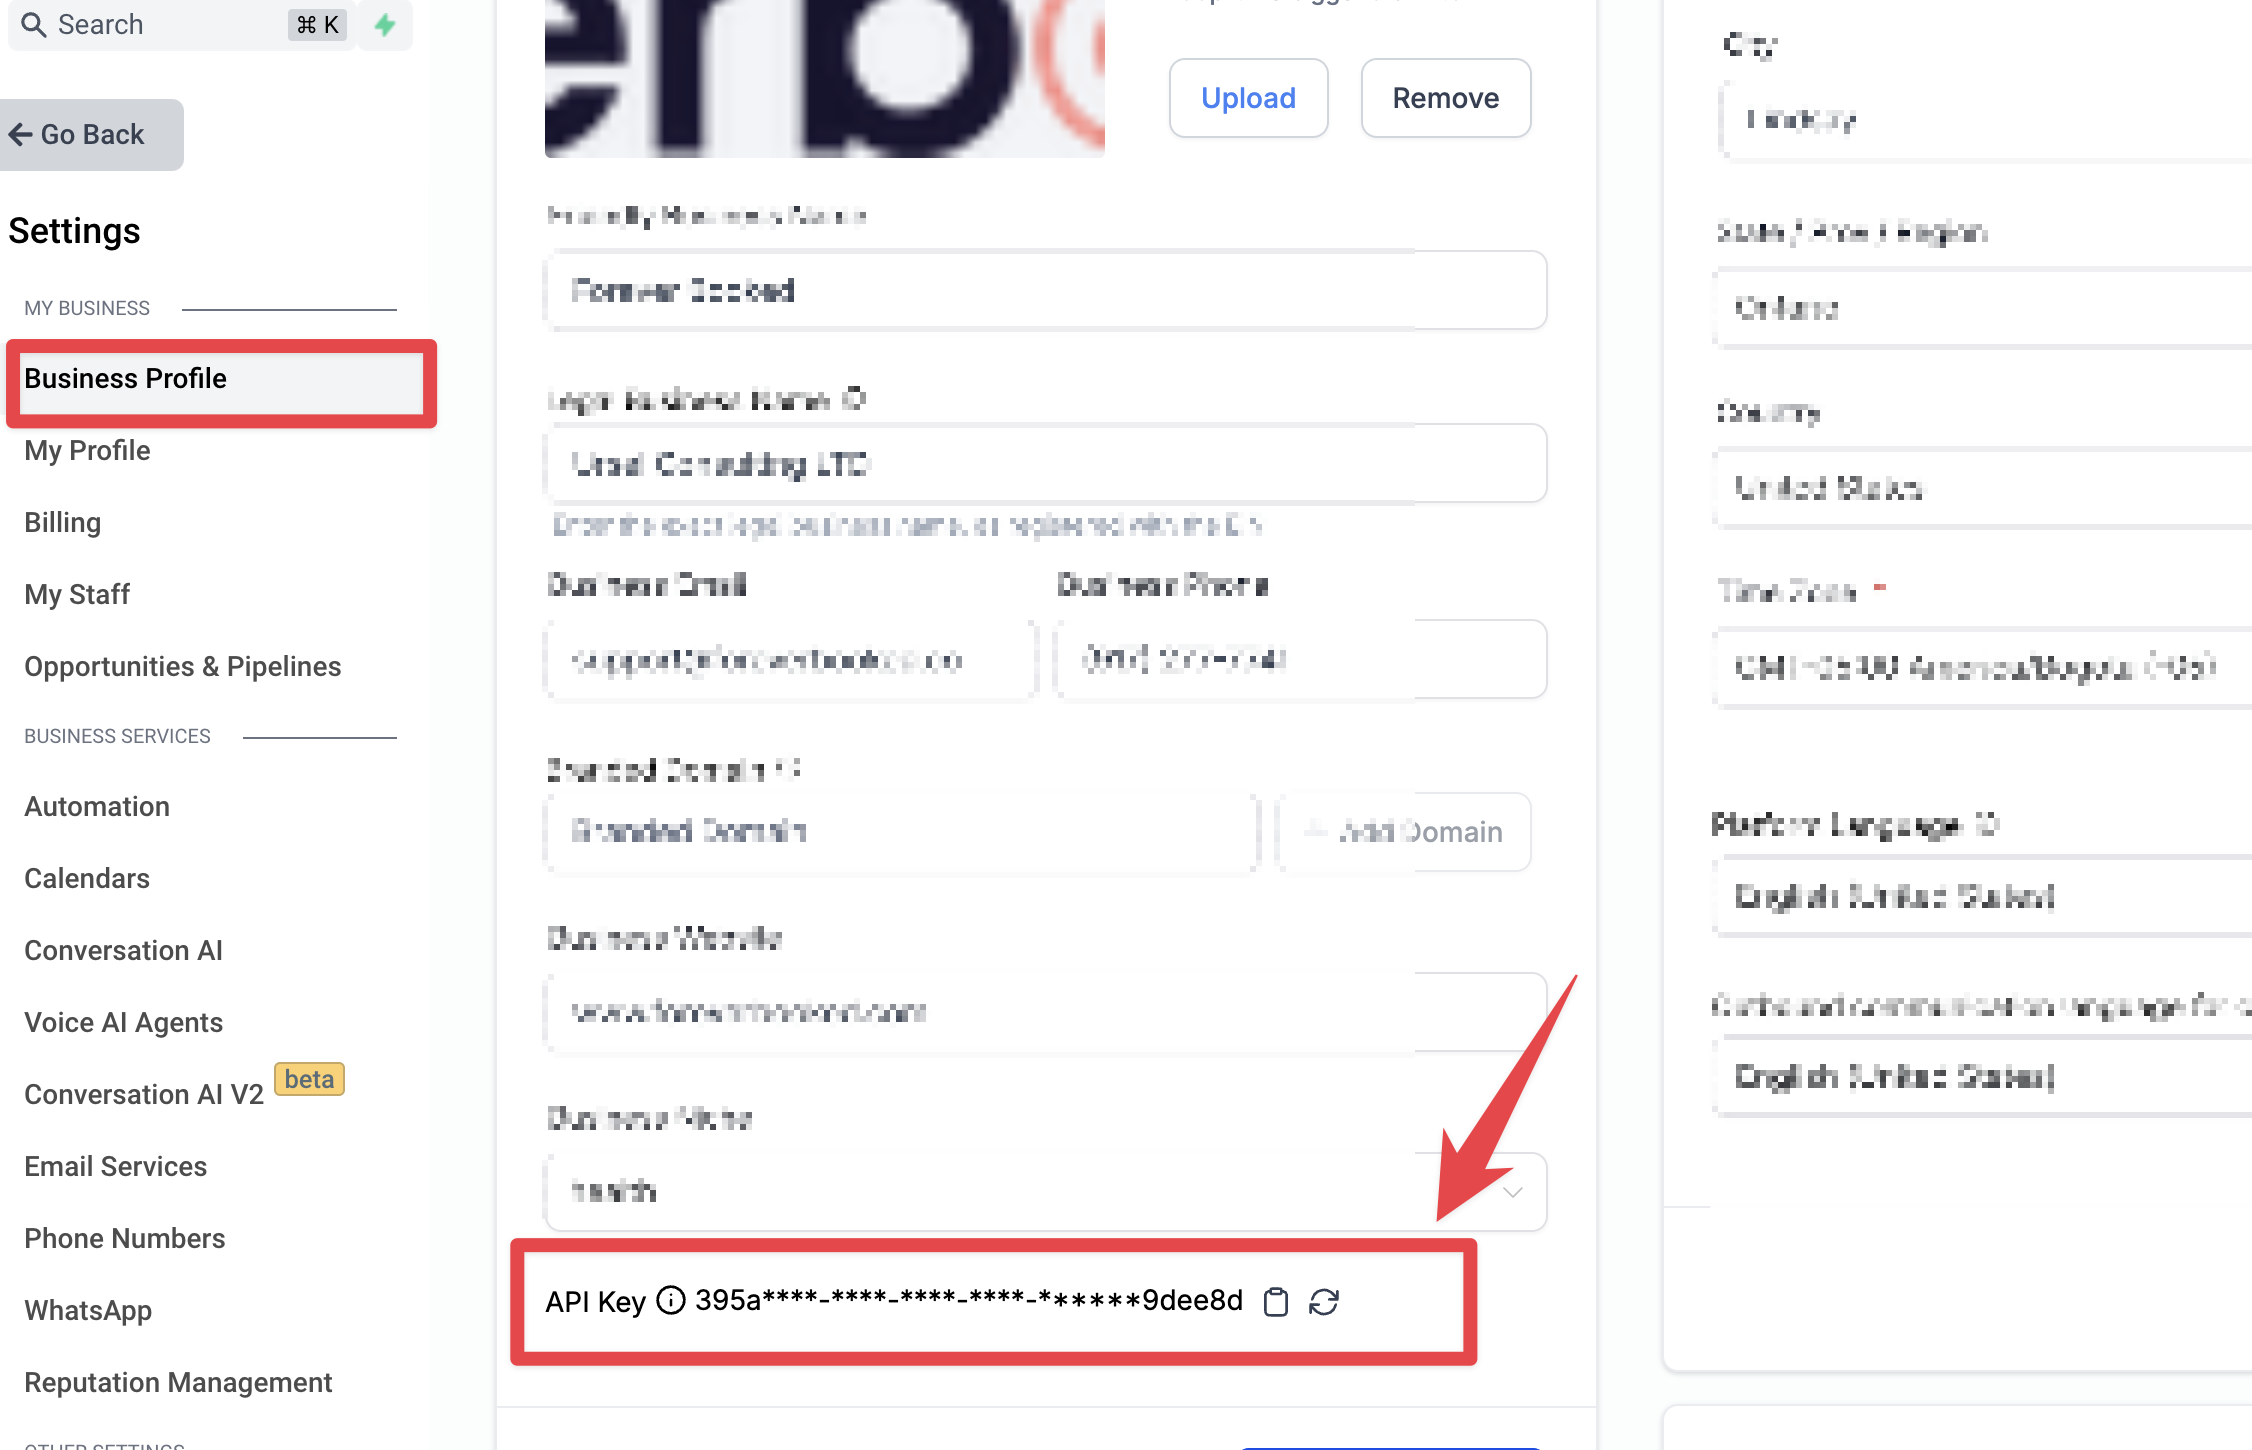
Copy your API Key from our software. Can be found in “Settings” -> “Business Profile”.
-
Enable the Chat-widget in LeadConnector Settings on your website.
If your website is hosted elsewhere:
You can install a piece of code in the body/footer of your website.
You will be provided with the necessary code through email once your Webchat System is configured by us. You can install this code independently or reach out to your webmaster.
If you have a Webmaster, reach out to them with the following email:
Hi there, I would like to install a chat widget on our website. Can you please add the following code to the body or footer section?
[insert code provided through email]